Team Secrets for Jira Server - Using a Custom S3 Bucket (OPTIONAL)
Team Secrets for Jira lets you to store encrypted secrets in an AWS S3 bucket of your choosing.
NOTE: this feature is optional and not required for Team Secrets to function - you only need follow these steps if you want to use your own custom S3 bucket for storing secrets.
NOTE: this feature and these instructions apply only to the Server version of Jira, not the Cloud/hosted version provided by Atlassian.
NOTE: a custom S3 bucket can only be associated with one Jira instance at a time. To associate it with another Jira instance, the association with the previous Jira instance must first be removed.
The storage configuration can be set in any of the following three ways, depending on the choices you make during configuration below:
Default Team Secrets Bucket - Secrets are stored in an S3 bucket in the Team Secrets corporate AWS account. For this approach, no additional storage configuration is required.
Custom S3 Bucket with Team Secrets IAM User - In this option, you specify a custom S3 bucket in your AWS account and you provide access to read/write/delete to an IAM user in the Team Secrets AWS account.
Custom S3 Bucket with Custom IAM User (RECOMMENDED)- This is the most secure option - you specify a custom S3 bucket and an IAM user in your AWS account and your secrets are never touched by any Team Secrets server or user.
Creating Your Custom S3 Bucket in AWS
1. Log into your company’s AWS S3 Management Console
2. Click on “Create bucket” to create a new bucket
NOTE: we recommend creating a new bucket and NOT using an existing bucket to avoid unwanted data impact.
NOTE: you are responsible to AWS for any costs and fees associated with this S3 bucket, including storage charges. For more details, see Cloud Storage Pricing.

3. Choose a Bucket name that follows your organization’s naming conventions
NOTE: it must be unique across all existing bucket names in S3.
4. Select the Region where you want the bucket to be located.
5. Do not provide any inputs in the “Copy settings from an existing bucket” section and click “Next”.

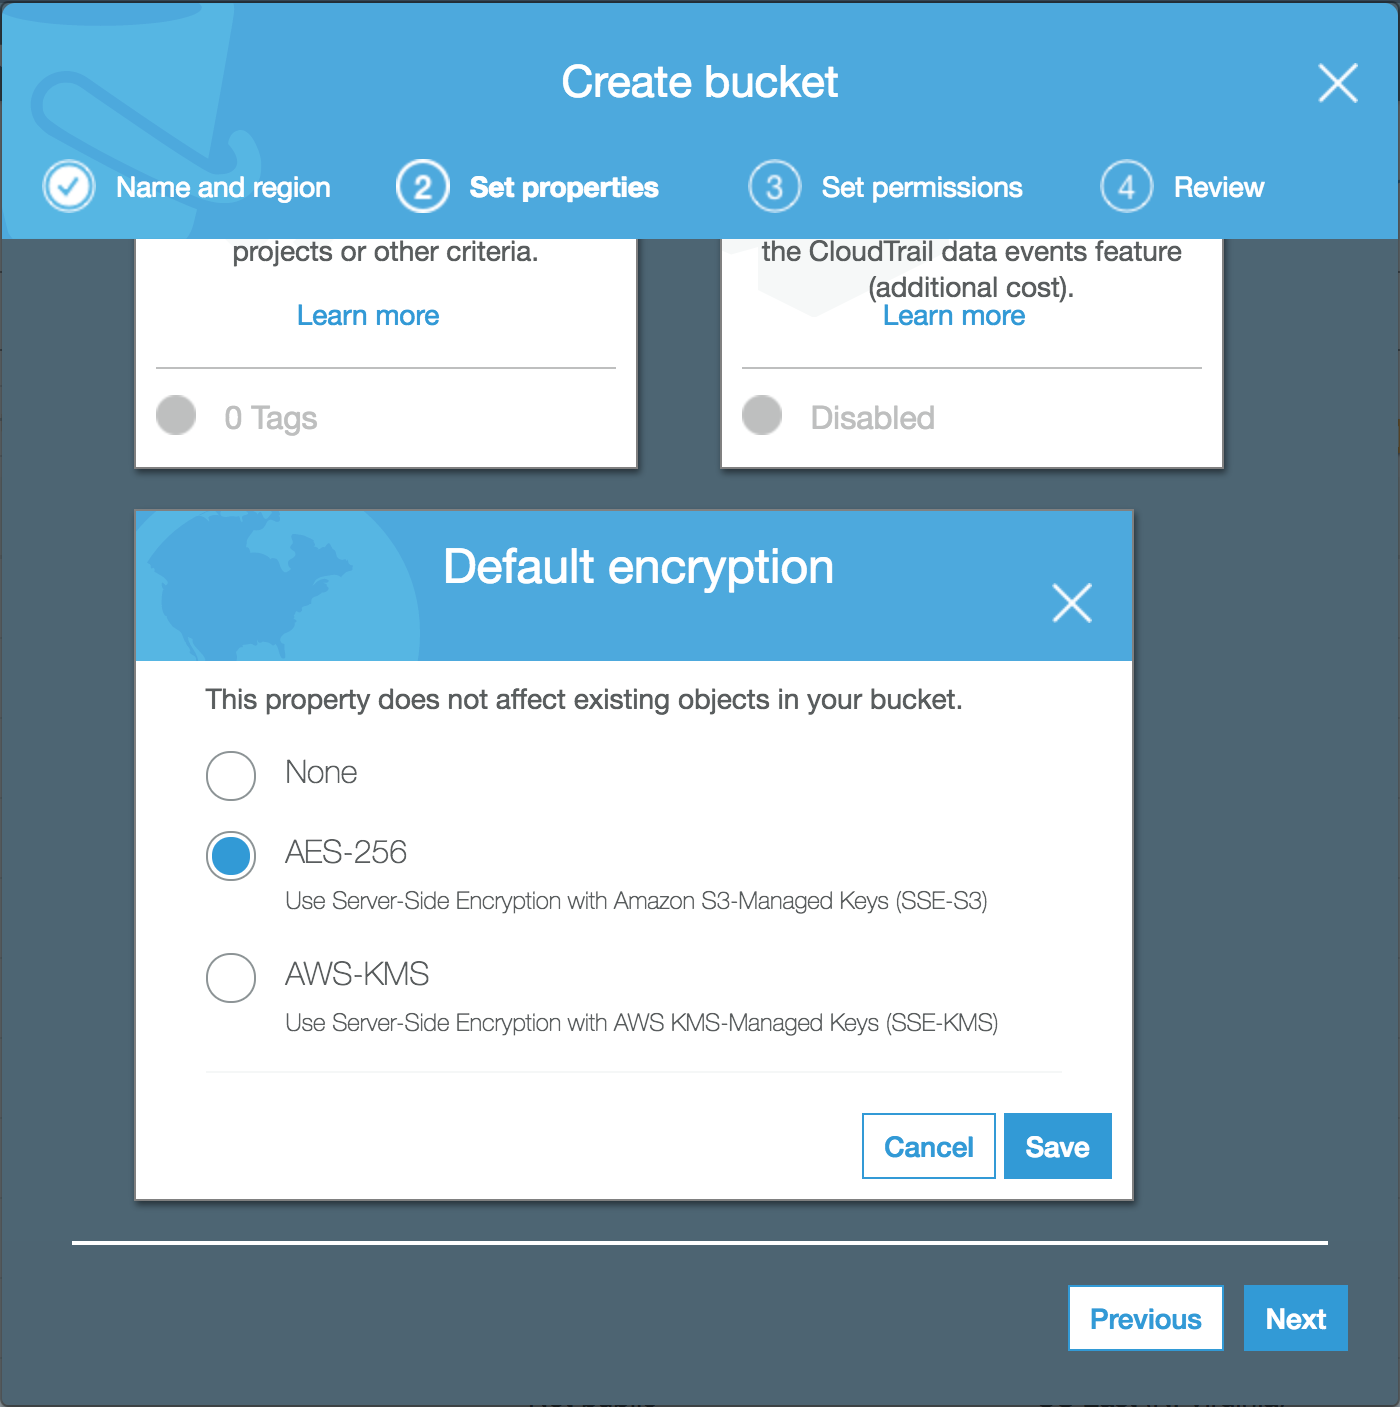
6. On the “Set properties” tab, scroll down and select “Default encryption”. choose “AES-256” then click “Save”, then “Next”.
NOTE: Because Team Secrets uploads are already encrypted, this step is optional, but highly recommended. For more details, see: Amazon S3 Default Encryption for S3 Buckets
7. Leave all settings on the “Set permissions” tab as default and click "Next"

8. Confirm your settings on the “4. Review” tab and click “Create bucket”

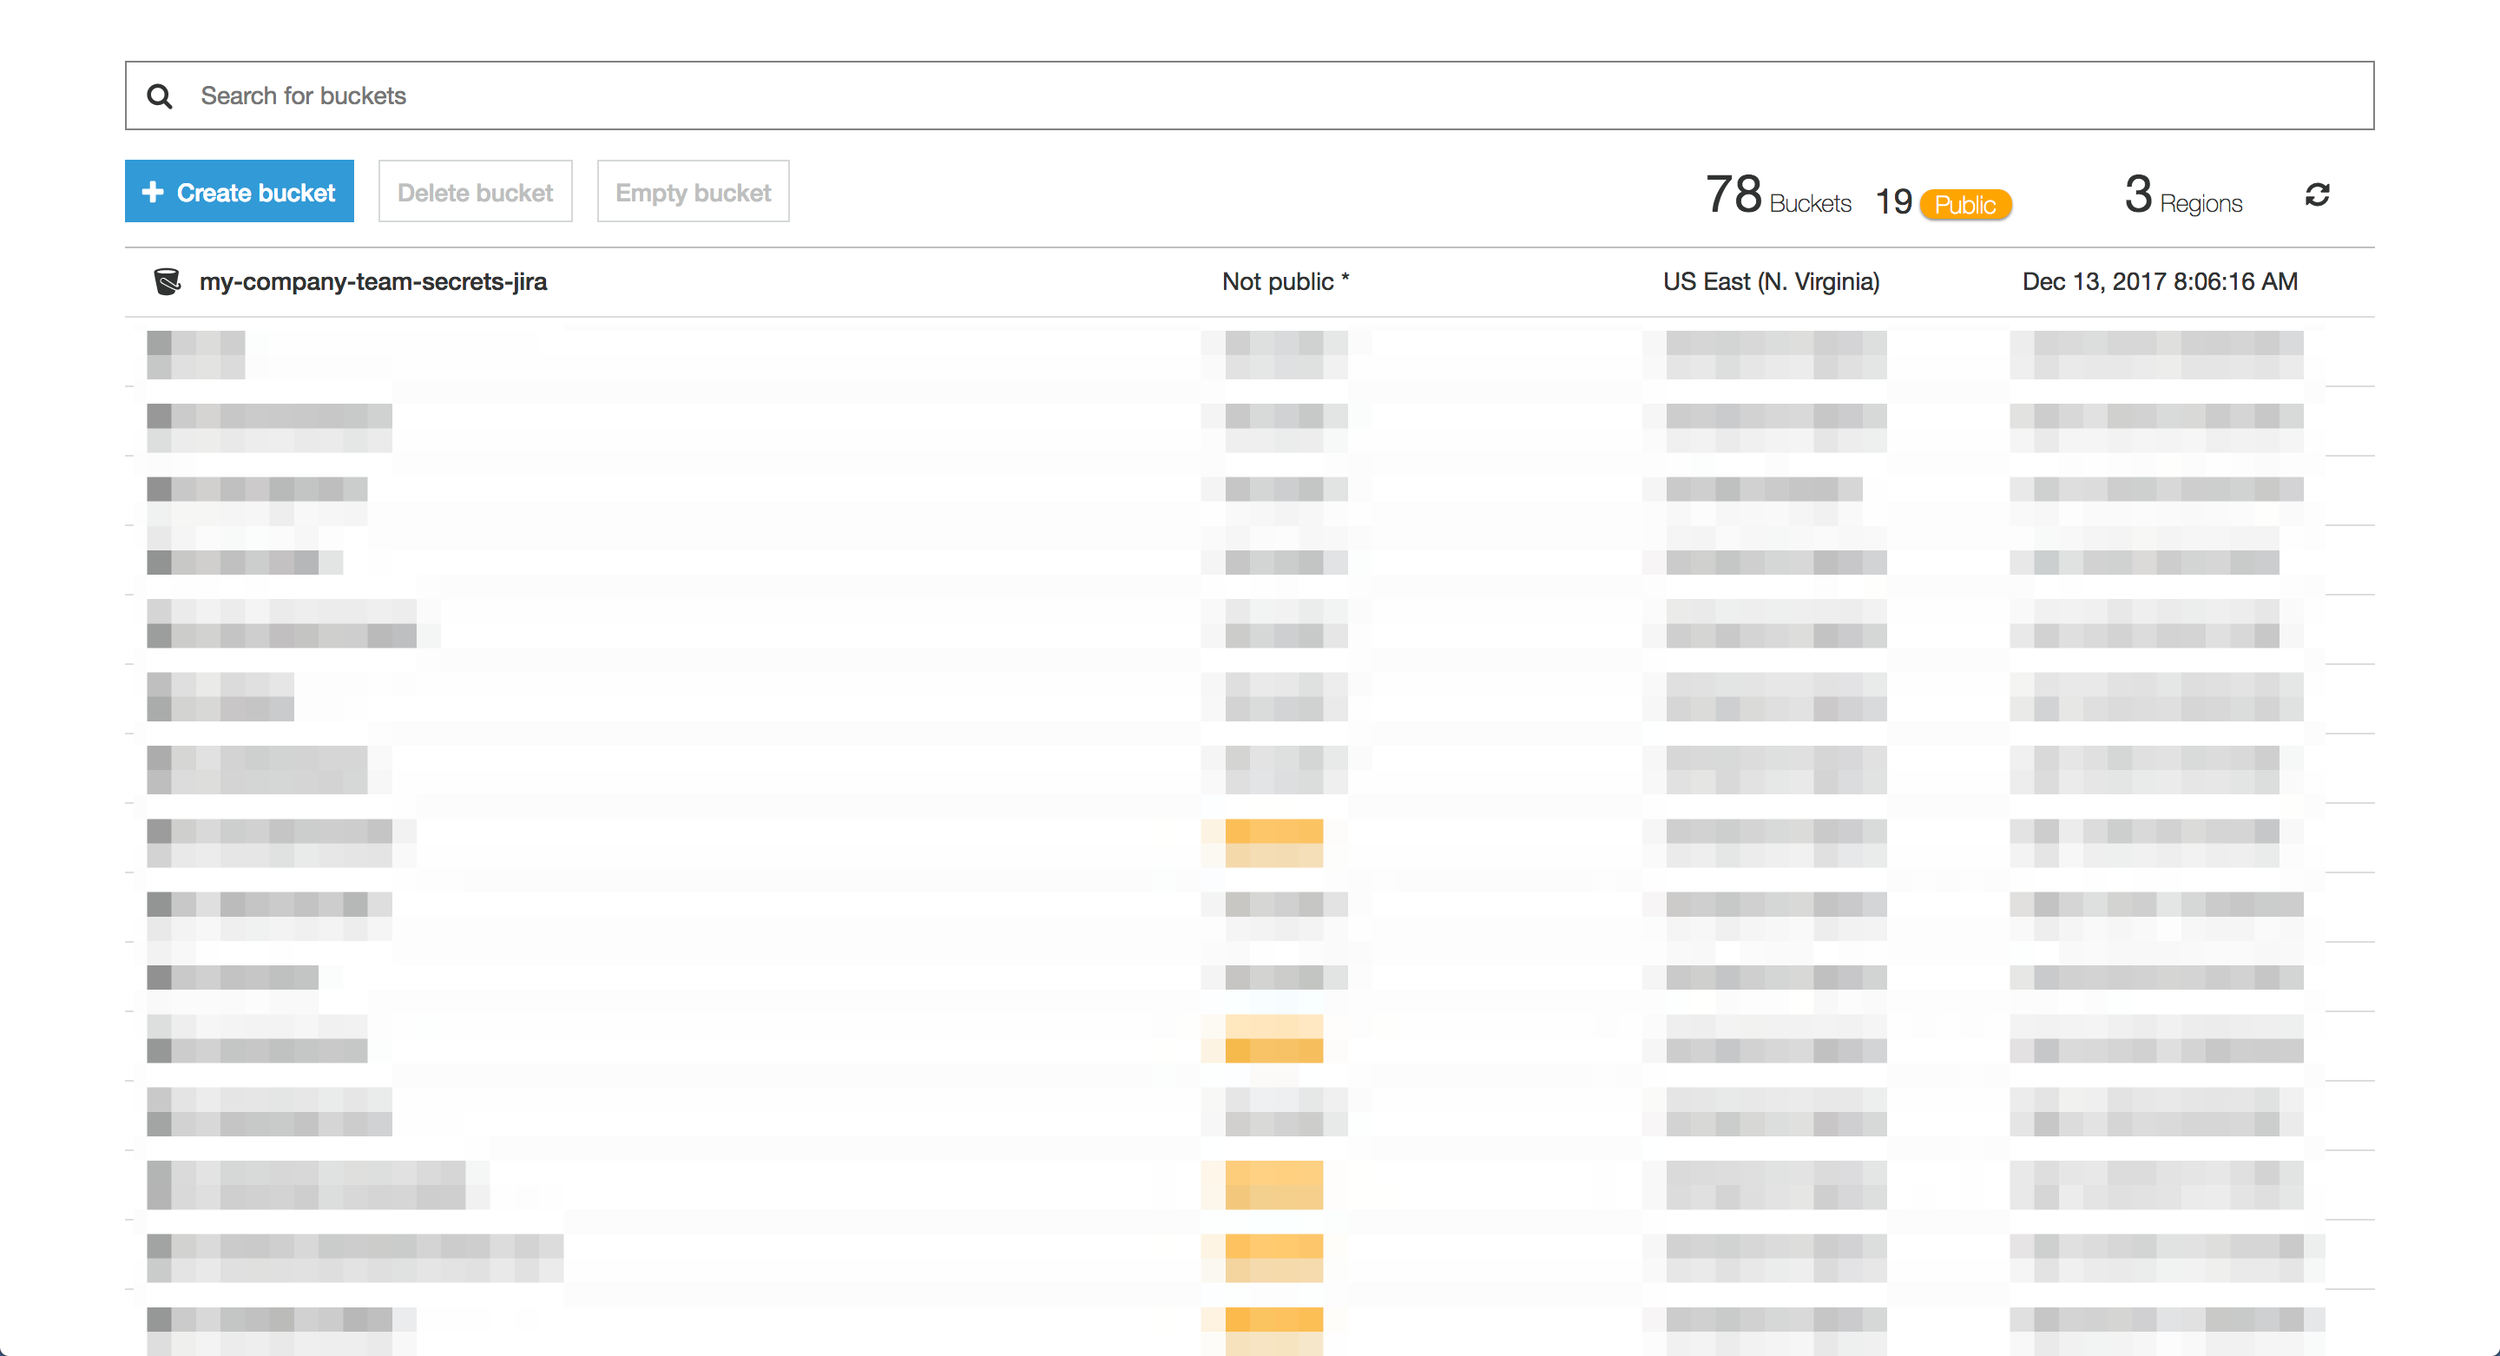
9. Confirm you can see the new bucket in your S3 console and that the Access column shows “Not public”.
10. Make note of the Bucket name and Region as we will need these details later when configuring the Team Secrets Jira Add-on.
11. Click on the bucket name to view the bucket details. You should see an empty bucket.

12. Click “CORS configuration” and add the following policy:

NOTE: This configuration ensures that API calls can be made from Jira to S3 since the domain of your Jira instance and your S3 bucket will be different. For more details on CORS refer to: Cross-Origin Resource Sharing (CORS)
Click “Save”
13. All remaining settings for the bucket can remain as set by default.
[
    {
        "AllowedHeaders": [
            "*"
        ],
        "AllowedMethods": [
            "HEAD",
            "GET",
            "PUT",
            "POST",
            "DELETE"
        ],
        "AllowedOrigins": [
            "https://app.teamsecrets.io/"
        ],
        "ExposeHeaders": []
    }
]
Add a “Bucket Policy” for the Team Secrets IAM User (OPTIONAL)
Note: This step is needed ONLY if you are using the “Custom S3 Bucket with TeamSecrets IAM User” option. You can skip this step if you are using a custom IAM User.
1. For your bucket, click on the “Permissions” tab.
2. Click on “Bucket Policy” and paste in the following bucket policy:

NOTE: This bucket policy gives a specific IAM user from the Team Secrets AWS account access to Get, Put, and Delete objects in this bucket. This user will not be able to access any other buckets or services in your AWS account. For more details on bucket policies, refer to: Using Bucket Policies and User Policies
NOTE: Make sure you replace [YOUR_BUCKET_NAME] with your actual bucket name.
Click “Save”.
{
    "Version": "2012-10-17",
    "Id": "Policy1511782738232",
    "Statement": [
        {
            "Sid": "Stmt1511782736332",
            "Effect": "Allow",
            "Principal": {
                "AWS": "arn:aws:iam::438365261431:user/team-secrets-customer-s3-access"
            },
            "Action": [
                "s3:PutObject",
                "s3:GetObject",
                "s3:DeleteObject"
            ],
            "Resource": "arn:aws:s3:::[YOUR_BUCKET_NAME]/*"
        }
    ]
}
Create a custom IAM user with programmatic access (OPTIONAL)
Note: This step is needed only if you are using “Custom S3 Bucket with Custom IAM User ” option. You can skip this step if you are using the Team Secrets IAM User.
1. Log into your company’s AWS IAM Users Console
2. Click "Add user" to create your new user and select only programmatic access.
3. IMPORTANT: Verify that the AWS Management Console access option is unchecked.
NOTE: This IAM user will be used to add, remove or retrieve secrets stored in your custom S3 bucket.
4. Click the “Next: Permissions” button.

5. Click “Create User”. Make a note of the Access Key ID and the Secret key from the Add User page or download the .csv files with the credentials.
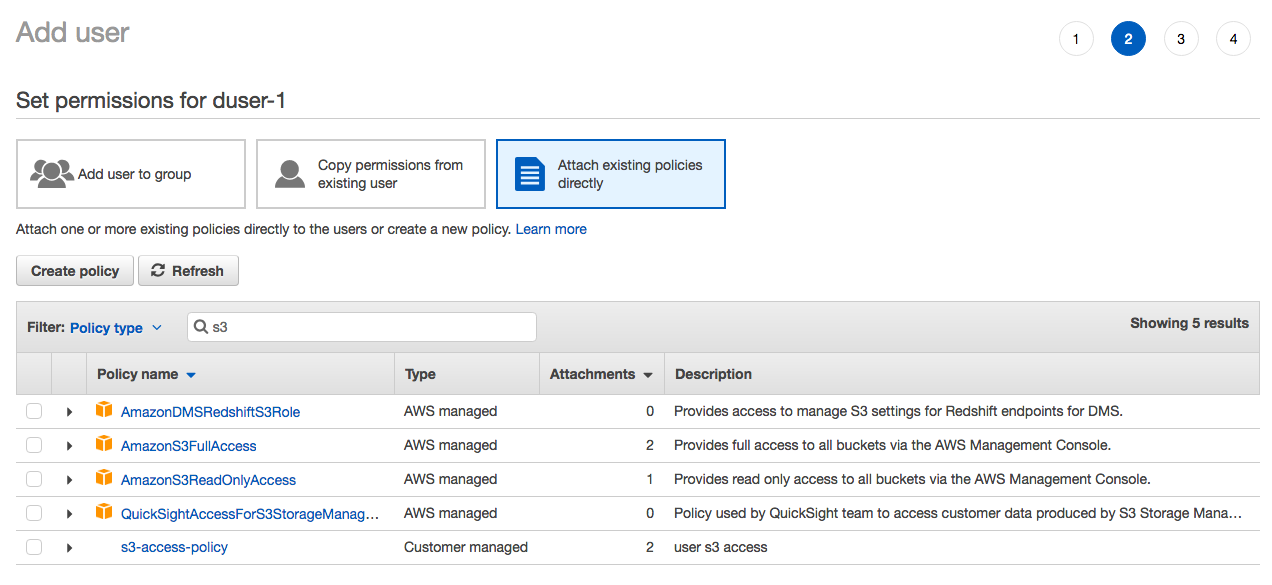
6. On the permissions screen, select the option “Attach existing policies directly” and search for the policy created in the previous step.
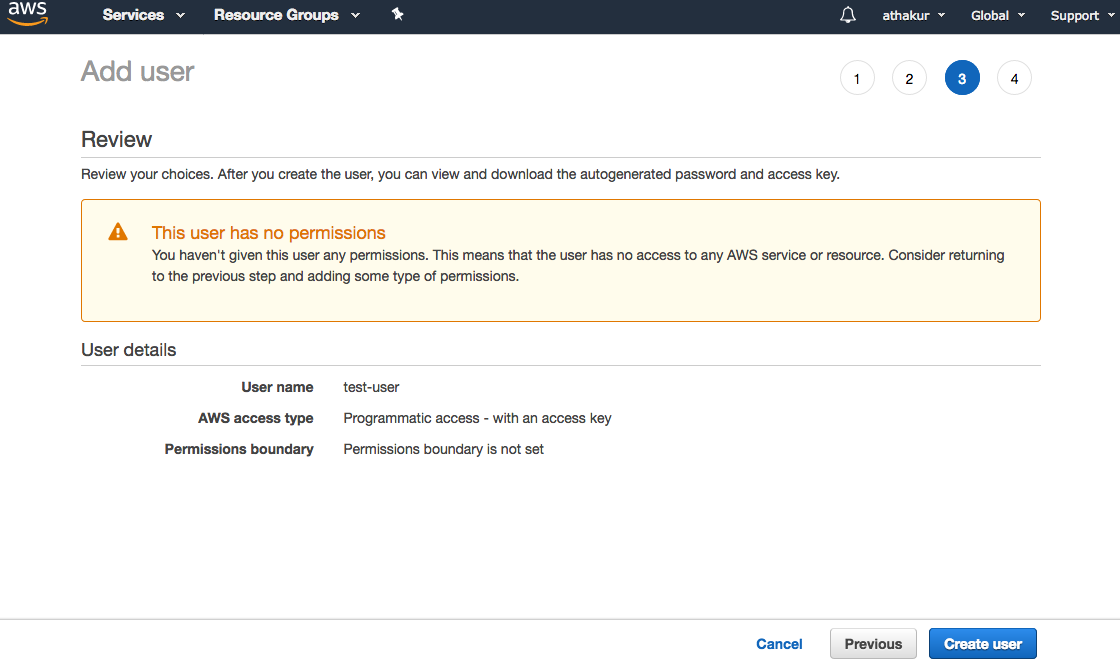
7. Select the policy and click the “Next: Review” button
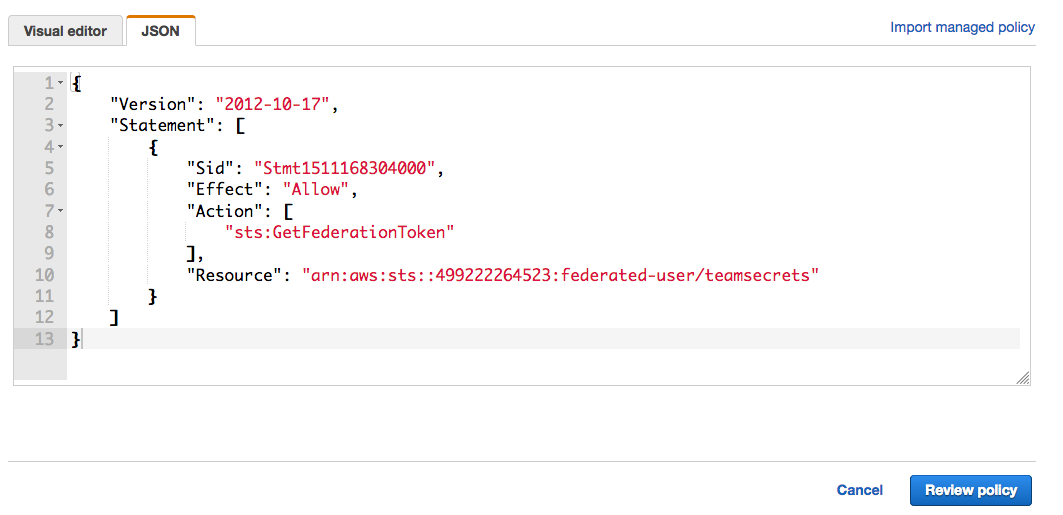
8. Once the user is created, open the user and on the Permissions tab, click on "Add inline policy"
9. Paste the following content into the JSON tab.
{
  "Version": "2012-10-17",
  "Statement": [{
    "Sid": "Stmt1511168304000",
    "Effect": "Allow",
    "Action": [
      "sts:GetFederationToken"
    ],
    "Resource": "arn:aws:sts::[CUSTOMERS_ ACCOUNT_NUMBER]:federated-user/teamsecrets"
  }]
}
NOTE: Be sure to replace the CUSTOMERS_ACCOUNT_NUMBER with your AWS account ID.
10. Click on "Review policy" and save it.
11. Follow the same steps mentioned above to create another inline policy with the following JSON to allow the user to perform operations on your custom S3 bucket:
NOTE: Replace the string MY_BUCKET_NAME with the name of the S3 bucket you created in earlier steps.
10. Click on "Review policy" and save it.
{
  "Version": "2012-10-17",
  "Statement": [
  {
    "Sid": "Stmt1528301431611",
    "Action": [
      "s3:DeleteObject",
      "s3:GetObject",
      "s3:PutObject"
    ],
    "Effect": "Allow",
    "Resource": "arn:aws:s3:::[BUCKET_NAME]/*"
  }
  ]
}
Configuring Jira
1. In your Jira instance, click the gear icon and choose “Add-ons”
2. Select “Manage add-ons” from the left menu.
3. Click “Team Secrets for Jira” and then choose “Configure”

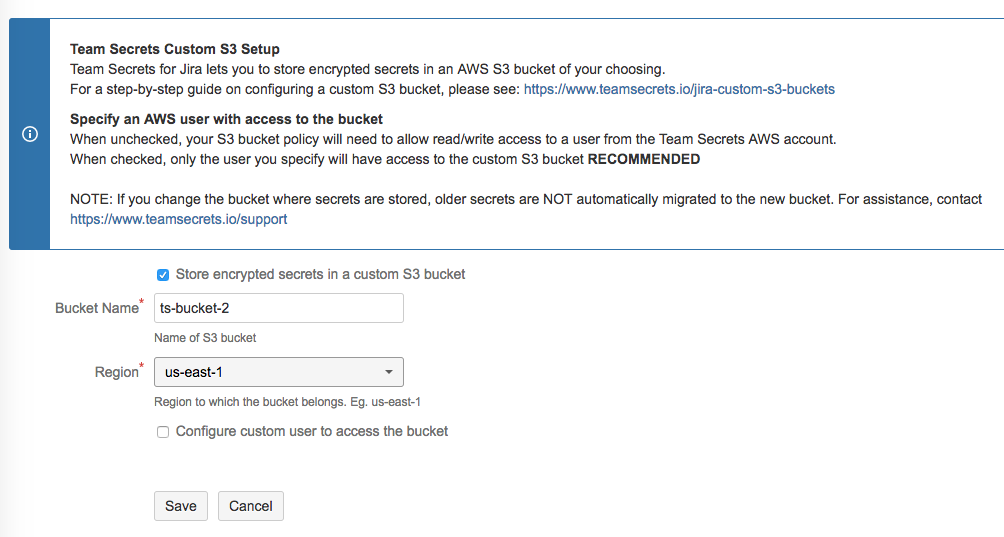
If you are using a Custom S3 Bucket with Team Secrets IAM User follow these steps:
Select the “Store encrypted secrets in a custom S3 bucket” checkbox.
Enter the “Bucket name” and select the “Region” (in which the S3 bucket is created) from the drop-down. For more details on regions, see: Regions and Availability Zones
Click "Save"
If you are using a Custom S3 Bucket with Custom IAM User follow these steps:
Select the “Store encrypted secrets in a custom S3 bucket” checkbox.
Enter the “Bucket name” and select the “Region” (in which the S3 bucket is created) from the drop-down. For more details on regions, see: Regions and Availability Zones
Enter the Access Key ID and Secret Key of the user created for S3 access and click "Save".

If everything is configured properly, you’ll see a message that says “Your custom S3 settings have been saved and validated.”
Team Secrets for Jira is now configured to store secrets in your custom S3 bucket!
If you have questions, issues or feedback, please contact us at https://www.teamsecrets.io/support